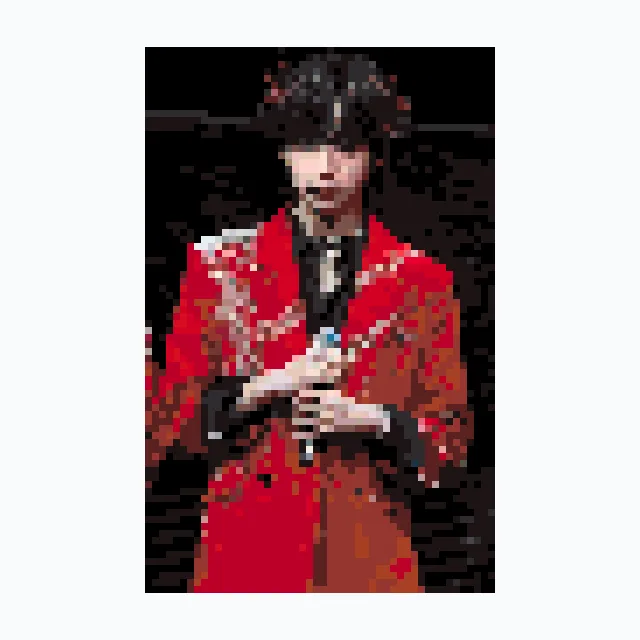
Finished size
36 × 48 cm
Estimated with standard 5 mm beads.
Free printable bead pattern
Download the 拼 perler bead pattern for free. This 72×96 design uses about 6,912 beads and matches the MARD palette.
Preview the pattern and material list, then export a color-coded image or PDF.
Full pattern shown. Zoom in to inspect details.
Make it with confidence
Check the board layout, high-use colors, and outline shades before placing the first bead.
Work from the edges into the large color areas, then finish the small details.
Finished size
36 × 48 cm
Estimated with standard 5 mm beads.
Pegboards
4 standard
Or 1 large 104×104 board.
Difficulty
advanced
Based on size and total bead count.
Choose the board layout before you place the first bead.
Check the material list before you start so missing colors do not interrupt the project.
Use the outline as a position reference before filling the largest areas.
Curves and diagonal lines can shift by one bead when a row changes.
Use the PDF for making and the image for sharing.
Even pressure and a full cooling cycle help the finished piece stay flat.
Choose the surface you want before the first pass.
Each material changes how heat and pressure reach the beads, so test the same brand and temperature on a small sample first.
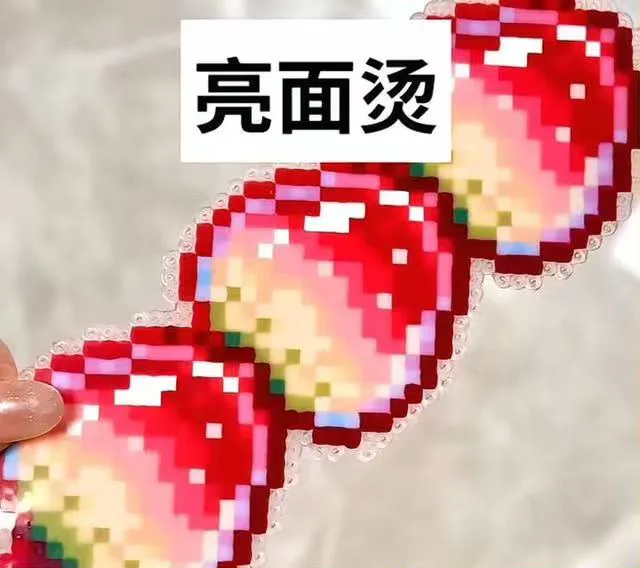
A reflective, sealed surface with stronger highlights and less visible bead texture.
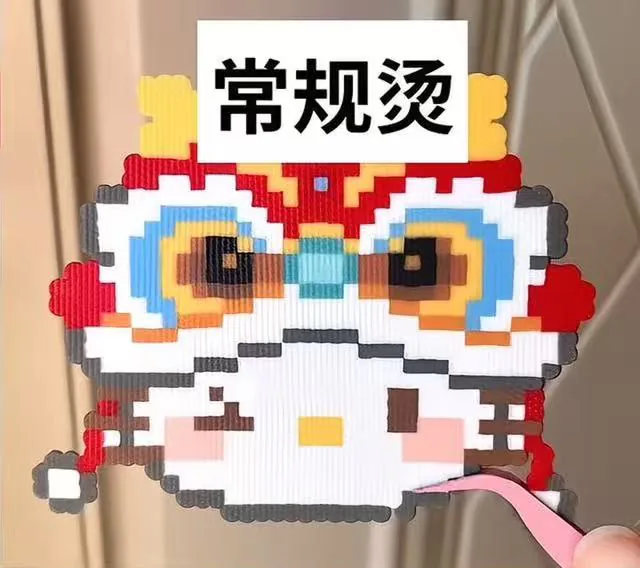
Clear bead outlines with balanced fusion, suitable for most display pieces.
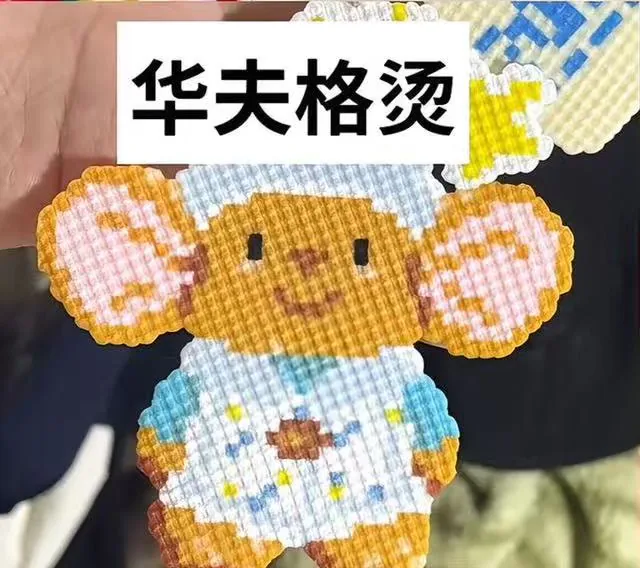
A fine grid is pressed into the fused surface for a regular woven texture.
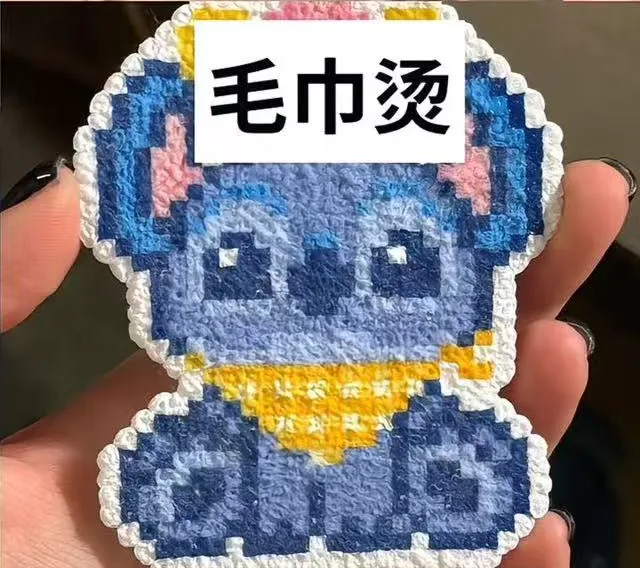
A soft fabric impression gives the surface a gentler, more tactile look.
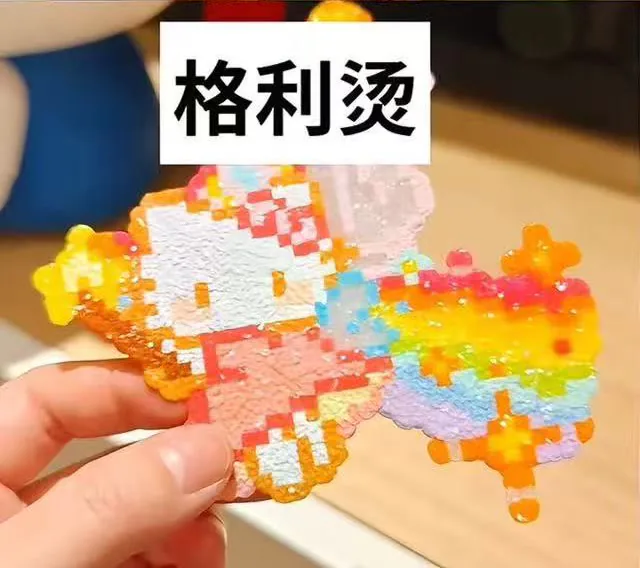
A transparent reflective layer adds sparkle while keeping the underlying colors visible.
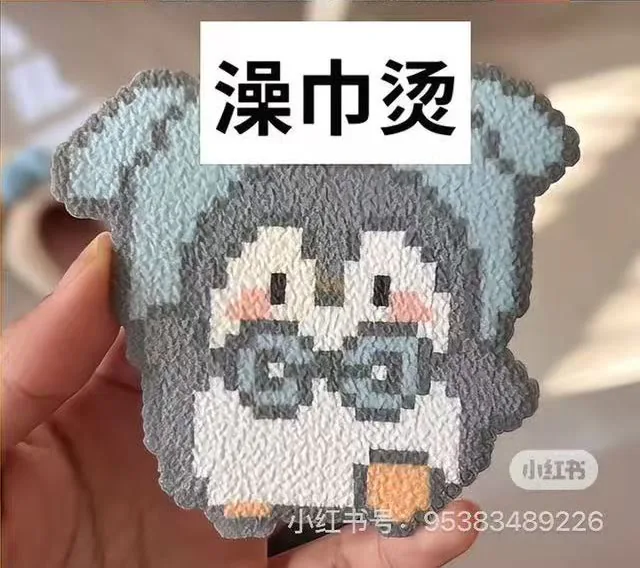
A fine, even cloth texture creates a softer matte surface.
The examples come from different pieces and lighting conditions. They compare general surface texture rather than serving as a controlled test.
Temperature, time, bead brand and barrier material all affect the result.
Place a flat, dry, thin towel with no heavy weave under the piece, then iron through heat-resistant paper. The softer base changes pressure and heat transfer, so test with spare beads and stop before over-fusing.
It is a heat-resistant sheet with sparkle or a molded texture that can transfer a glossy or patterned finish. Products tolerate different temperatures, so follow the material instructions and begin with a short test.
Using masking tape: Use it for large or fragile layouts, or whenever the unfused beads must leave the pegboard before ironing.
Without masking tape: Small patterns can stay on the pegboard, and some texture sheets do not require a transfer step.
Do not confuse the two papers.
Masking tape holds and transfers unfused beads. It does not replace ironing paper or parchment.
Keep a heat-resistant barrier between the iron and the piece.
| Finish material | Flip? |
|---|---|
| Ironing paper or parchment | Yes |
| Glossy sheet | Yes |
| Towel or wet cloth | No |
| Glitter or texture sheet | No |
| Steamer cloth | No |
| Diamond texture sheet | No |
| Finish material | Flip? |
|---|---|
| Ironing paper or parchment | No |
| Glossy sheet | No |
| Towel or wet cloth | Yes |
| Glitter or texture sheet | Yes |
| Steamer cloth | Yes |
| Diamond texture sheet | No |
Here, “flip” means turning the piece so the intended texture surface touches the beads. It is separate from ironing both sides for extra strength.
FAQ
Yes. Match by the displayed color and verify close shades before buying. The current list is mapped to MARD.
Use 4 standard 52×52 boards or 1 large 104×104 board.
Export the coded PDF and complete the design in labeled sections. Check the seam between sections before ironing.
One-sided ironing is usually enough for framed or display pieces. Iron both sides for keychains or pieces that will be handled often, but keep some bead holes visible so the result does not become brittle.
Move the iron continuously, avoid overheating the edges, then cool the piece under a flat, heat-safe weight before lifting it.
An adult should handle the hot iron and heat-resistant paper. Keep children away from the heated work surface until the piece has cooled completely.
Yes, but scaling changes the grid and color count. Regenerate the pattern at the target dimensions instead of stretching the exported image.
Secure it in sections with masking tape or complete it on connected pegboards. Check every board seam before transferring or ironing.
Keep making
Browse more bead patterns with a similar size profile and popular library picks.